shaderToy学习
shaderToy 中均为全屏绘制,即绘制一个 4 边形,在上面生成各种效果
- 主程序
#include <glad/glad.h> #include <GLFW/glfw3.h> #include <glm/glm.hpp> #include <glm/gtc/matrix_transform.hpp> #include <glm/gtc/type_ptr.hpp> #include "filesystem.h" #include "shader.h" #include "camera.h" #include "model.h" #include <iostream> #define STB_IMAGE_IMPLEMENTATION #include <stb_image.h> void framebuffer_size_callback(GLFWwindow* window, int width, int height); void mouse_callback(GLFWwindow* window, double xpos, double ypos); void scroll_callback(GLFWwindow* window, double xoffset, double yoffset); void processInput(GLFWwindow* window); unsigned int loadTexture(const char* path); // settings const unsigned int SCR_WIDTH = 800; const unsigned int SCR_HEIGHT = 600; // camera Camera camera(glm::vec3(0.0f, 0.0f, 3.0f)); float lastX = (float)SCR_WIDTH / 2.0; float lastY = (float)SCR_HEIGHT / 2.0; bool firstMouse = true; // timing float deltaTime = 0.0f; float lastFrame = 0.0f; int main() { // glfw: initialize and configure // ------------------------------ glfwInit(); glfwWindowHint(GLFW_CONTEXT_VERSION_MAJOR, 3); glfwWindowHint(GLFW_CONTEXT_VERSION_MINOR, 3); glfwWindowHint(GLFW_OPENGL_PROFILE, GLFW_OPENGL_CORE_PROFILE); #ifdef __APPLE__ glfwWindowHint(GLFW_OPENGL_FORWARD_COMPAT, GL_TRUE); #endif // glfw window creation // -------------------- GLFWwindow* window = glfwCreateWindow(SCR_WIDTH, SCR_HEIGHT, "LearnOpenGL", NULL, NULL); if (window == NULL) { std::cout << "Failed to create GLFW window" << std::endl; glfwTerminate(); return -1; } glfwMakeContextCurrent(window); glfwSetFramebufferSizeCallback(window, framebuffer_size_callback); // tell GLFW to capture our mouse glfwSetInputMode(window, GLFW_CURSOR, GLFW_CURSOR_DISABLED); // glad: load all OpenGL function pointers // --------------------------------------- if (!gladLoadGLLoader((GLADloadproc)glfwGetProcAddress)) { std::cout << "Failed to initialize GLAD" << std::endl; return -1; } // configure global opengl state // ----------------------------- glEnable(GL_DEPTH_TEST); glDepthFunc(GL_LESS); // ------------------------- Shader shader("vertex_shader.glsl", "fragment_shader.glsl"); // set up vertex data (and buffer(s)) and configure vertex attributes // ------------------------------------------------------------------ float quadVertices[] = { -1.0f, -1.0f, 1.0f, -1.0f, -1.0f, 1.0f, 1.0f, 1.0f, }; // cube VAO GLuint VAO, VBO; glGenVertexArrays(1, &VAO); glGenBuffers(1, &VBO); glBindVertexArray(VAO); glBindBuffer(GL_ARRAY_BUFFER, VBO); glBufferData(GL_ARRAY_BUFFER, sizeof(quadVertices), quadVertices, GL_STATIC_DRAW); glVertexAttribPointer(0, 2, GL_FLOAT, GL_FALSE, 2 * sizeof(float), (void*)0); glEnableVertexAttribArray(0); glBindBuffer(GL_ARRAY_BUFFER, 0); glBindVertexArray(0); shader.use(); while (!glfwWindowShouldClose(window)) { // per-frame time logic // -------------------- float currentFrame = static_cast<float>(glfwGetTime()); deltaTime = currentFrame - lastFrame; lastFrame = currentFrame; // input // ----- processInput(window); // render // ------ glClearColor(0.1f, 0.1f, 0.1f, 1.0f); glClear(GL_COLOR_BUFFER_BIT | GL_DEPTH_BUFFER_BIT | GL_STENCIL_BUFFER_BIT); // don't forget to clear the stencil buffer! // set uniforms shader.use(); glBindVertexArray(VAO); GLint iResolutionLoc = glGetUniformLocation(shader.ID, "iResolution"); GLint iTimeLoc = glGetUniformLocation(shader.ID, "iTime"); GLint iMouseLoc = glGetUniformLocation(shader.ID, "iMouse"); glUniform3f(iResolutionLoc, SCR_WIDTH, SCR_HEIGHT, 1.0f); glUniform1f(iTimeLoc, glfwGetTime()); glDrawArrays(GL_TRIANGLE_STRIP, 0, 4); glBindVertexArray(0); // glfw: swap buffers and poll IO events (keys pressed/released, mouse moved etc.) // ------------------------------------------------------------------------------- glfwSwapBuffers(window); glfwPollEvents(); } // optional: de-allocate all resources once they've outlived their purpose: // ------------------------------------------------------------------------ glDeleteVertexArrays(1, &VAO); glDeleteBuffers(1, &VBO); glfwTerminate(); return 0; } // process all input: query GLFW whether relevant keys are pressed/released this frame and react accordingly // --------------------------------------------------------------------------------------------------------- void processInput(GLFWwindow* window) { if (glfwGetKey(window, GLFW_KEY_ESCAPE) == GLFW_PRESS) glfwSetWindowShouldClose(window, true); if (glfwGetKey(window, GLFW_KEY_W) == GLFW_PRESS) camera.ProcessKeyboard(FORWARD, deltaTime); if (glfwGetKey(window, GLFW_KEY_S) == GLFW_PRESS) camera.ProcessKeyboard(BACKWARD, deltaTime); if (glfwGetKey(window, GLFW_KEY_A) == GLFW_PRESS) camera.ProcessKeyboard(LEFT, deltaTime); if (glfwGetKey(window, GLFW_KEY_D) == GLFW_PRESS) camera.ProcessKeyboard(RIGHT, deltaTime); } // glfw: whenever the window size changed (by OS or user resize) this callback function executes // --------------------------------------------------------------------------------------------- void framebuffer_size_callback(GLFWwindow* window, int width, int height) { // make sure the viewport matches the new window dimensions; note that width and // height will be significantly larger than specified on retina displays. glViewport(0, 0, width, height); } unsigned int loadTexture(char const* path) { unsigned int textureID; glGenTextures(1, &textureID); int width, height, nrComponents; unsigned char* data = stbi_load(path, &width, &height, &nrComponents, 0); if (data) { GLenum format; if (nrComponents == 1) format = GL_RED; else if (nrComponents == 3) format = GL_RGB; else if (nrComponents == 4) format = GL_RGBA; glBindTexture(GL_TEXTURE_2D, textureID); glTexImage2D(GL_TEXTURE_2D, 0, format, width, height, 0, format, GL_UNSIGNED_BYTE, data); glGenerateMipmap(GL_TEXTURE_2D); glTexParameteri(GL_TEXTURE_2D, GL_TEXTURE_WRAP_S, GL_REPEAT); glTexParameteri(GL_TEXTURE_2D, GL_TEXTURE_WRAP_T, GL_REPEAT); glTexParameteri(GL_TEXTURE_2D, GL_TEXTURE_MIN_FILTER, GL_LINEAR_MIPMAP_LINEAR); glTexParameteri(GL_TEXTURE_2D, GL_TEXTURE_MAG_FILTER, GL_LINEAR); stbi_image_free(data); } else { std::cout << "Texture failed to load at path: " << path << std::endl; stbi_image_free(data); } return textureID; } - 顶点着色器
#version 330 core
layout (location = 0) in vec2 aPos;
out vec2 TexCoords;
void main() {
    TexCoords = aPos * 0.5 + 0.5;
    gl_Position = vec4(aPos, 0.0, 1.0);
}
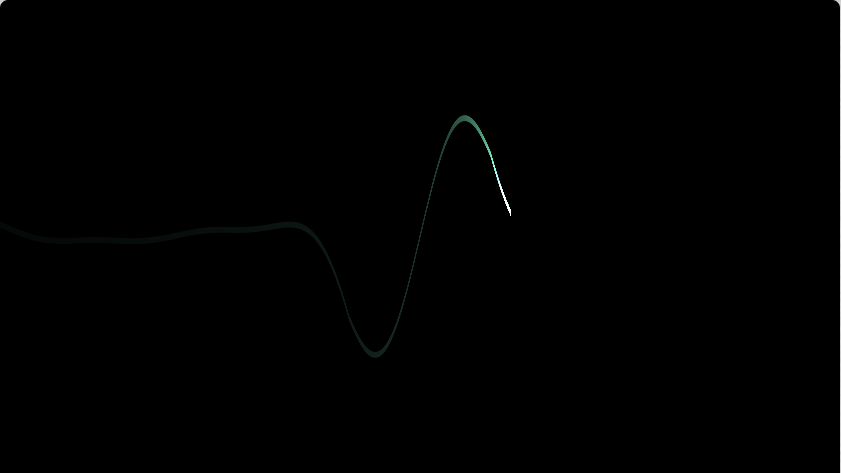
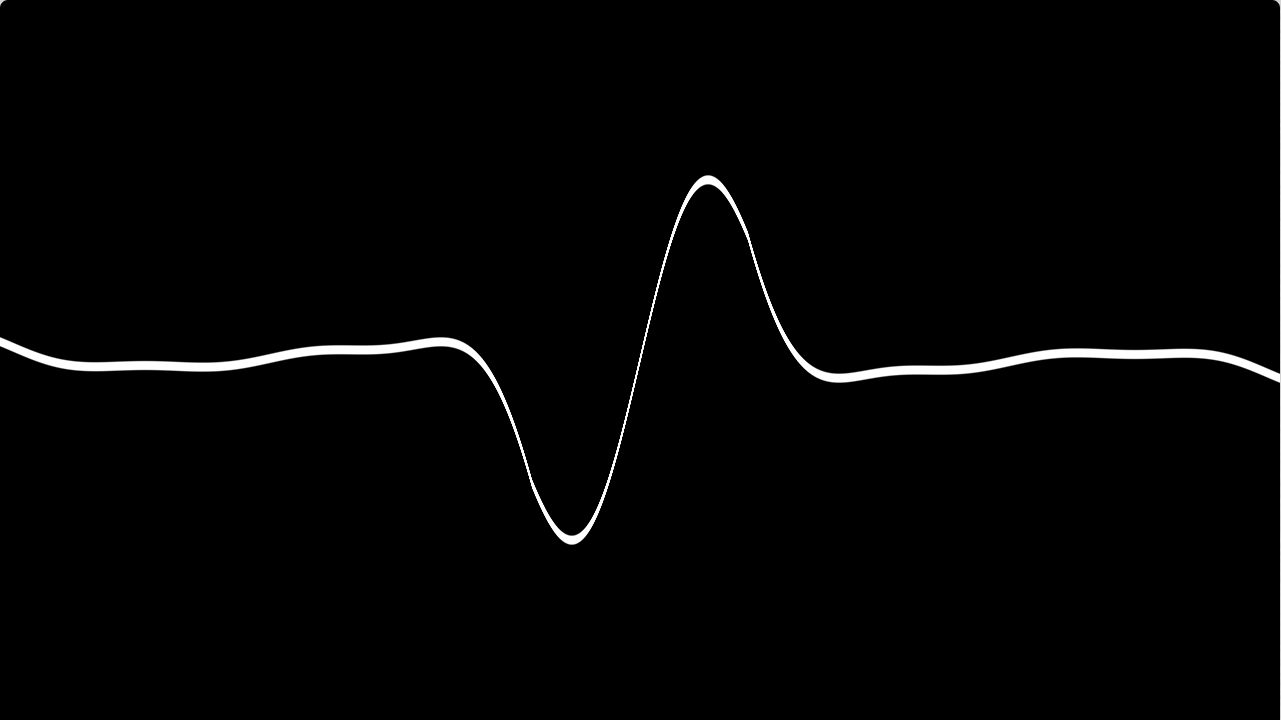
Electrocardiogram_Loewe

#version 330 core // OpenGL 着色器版本
uniform vec3 iResolution;       // 屏幕分辨率
uniform float iTime;            // 时间

out vec4 fragColor;             // 输出颜色

void main() {
    vec2 fragCoord = gl_FragCoord.xy; // 屏幕坐标
    vec2 uv = (-iResolution.xy + 2.0 * fragCoord) / iResolution.y;//归一化到[-1,1]

    // Shadertoy 的核心代码
    vec2 uv2 = uv;
    uv2.x += iResolution.x / iResolution.y;
    uv2.x -= 2.0 * mod(iTime, 1.0 * iResolution.x / iResolution.y);
    float width = -(1.0 / (25.0 * uv2.x));
    vec3 l = vec3(width, width * 1.9, width * 1.5);

    uv.y *= 2.0;
    float xx = abs(1.0 / (20.0 * max(abs(uv.x), 0.3)));

    uv.x *= 3.0;
    uv.y -= xx * (sin(uv.x) + 3.0 * sin(2.0 * uv.x) + 2.0 * sin(3.0 * uv.x) + sin(4.0 * uv.x));
    vec3 col = mix(vec3(1), vec3(0), smoothstep(0.02, 0.03, abs(uv.y)));

    fragColor = vec4(col * l, 1.0);
}
col*l
- 其中 col 控制的是形状
 -
- l 控制的是对于 x 变化的颜色

l 光波
vec2 uv = (-iResolution.xy + 2.0 * fragCoord) / iResolution.y;- 初始范围是
[-aspect, aspect],其中aspect = iResolution.x / iResolution.y。 - 为什么要使用
fragCoord) / iResolution.y修正:保证任意比例下显示出来看起来一样(比如要显示一个圆,长款都是 0.5 归一化范围就会有问题,因为实际长度是不一致的)
- 初始范围是
uv2.x += iResolution.x / iResolution.y;- 进行偏移
- 范围变为
[0, 2 * aspect]
uv2.x -= 2.0 * mod(iTime, 1.0 * iResolution.x / iResolution.y);- 减去一个随时间线性增加的值, (即向右传递)
uv2.x的范围覆盖了[-2 * aspect, 2 * aspect]float width = -(1.0 / (25.0 * uv2.x)); vec3 l = vec3(width, width * 1.9, width * 1.5);
uv2.x趋近与 0(且大于 0,即左侧)时亮度更大- 双侧光波
float width = abs(-(1.0 / (25.0 * uv2.x)));
col 正弦
float xx = abs(1.0 / (20.0 * max(abs(uv.x), 0.3)));- 它的值与
uv.x绝对值的大小成反比
- 它的值与
uv.y -= xx * (sin(uv.x) + 3.0 * sin(2.0 * uv.x) + 2.0 * sin(3.0 * uv.x) + sin(4.0 * uv.x));- 这一行代码是波形的核心,通过多个正弦波叠加形成复杂的波形
vec3 col = mix(vec3(1), vec3(0), smoothstep(0.02, 0.03, abs(uv.y)));- 限定波附近的像素发光
smoothstep用于将片元到波形的距离(abs(uv.y))映射到一个平滑的梯度值:(用于限定发光区域的宽度)- 当
abs(uv.y) < 0.02时,返回接近0的值(线条内部,颜色接近白色)。 - 当
abs(uv.y) > 0.03时,返回接近1的值(线条外部,颜色接近黑色)。 - 在
0.02到0.03的区间内,进行平滑插值过渡。
- 当
mix(vec3(1), vec3(0), ...):- 插值
vec3(1)(白色)和vec3(0)(黑色),根据smoothstep的结果生成最终颜色。 - 白色的线条区域:对应
uv.y接近 0 的位置,表示片元接近波形线条中心。 - 黑色的背景区域:对应
uv.y远离波形线条的位置,表示片元远离波形中心。
- 插值
Just snow

// "Just snow" - 重写版
// 使用简单的多层视差效果生成雪花,带有景深效果。

#define LIGHT_SNOW // 注释此行可切换为暴风雪模式

#ifdef LIGHT_SNOW
    #define LAYERS 50
    #define DEPTH 0.5
    #define WIDTH 0.3
    #define SPEED 0.6
#else
    #define LAYERS 200
    #define DEPTH 0.1
    #define WIDTH 0.8
    #define SPEED 1.5
#endif

uniform vec3 iResolution; // 屏幕分辨率
uniform vec4 iMouse;      // 鼠标位置
uniform float iTime;      // 时间

void main() {
    const mat3 p = mat3(13.323122, 23.5112, 21.71123,
                        21.1212,  28.7312, 11.9312,
                        21.8112,  14.7212, 61.3934);

    vec2 uv = iMouse.xy / iResolution.xy + vec2(1.0, iResolution.y / iResolution.x) * gl_FragCoord.xy / iResolution.xy;
    vec3 acc = vec3(0.0);
    float dof = 5.0 * sin(iTime * 0.1);

    for (int i = 0; i < LAYERS; i++) {
        float fi = float(i);
        vec2 q = uv * (1.0 + fi * DEPTH);
        q += vec2(q.y * (WIDTH * mod(fi * 7.238917, 1.0) - WIDTH * 0.5), SPEED * iTime / (1.0 + fi * DEPTH * 0.03));

        vec3 n = vec3(floor(q), 31.189 + fi);
        vec3 m = floor(n) * 0.00001 + fract(n);
        vec3 mp = (31415.9 + m) / fract(p * m);
        vec3 r = fract(mp);

        vec2 s = abs(mod(q, 1.0) - 0.5 + 0.9 * r.xy - 0.45);
        s += 0.01 * abs(2.0 * fract(10.0 * q.yx) - 1.0);

        float d = 0.6 * max(s.x - s.y, s.x + s.y) + max(s.x, s.y) - 0.01;
        float edge = 0.005 + 0.05 * min(0.5 * abs(fi - 5.0 - dof), 1.0);

        acc += vec3(smoothstep(edge, -edge, d) * (r.x / (1.0 + 0.02 * fi * DEPTH)));
    }

    gl_FragColor = vec4(acc, 1.0);
}
vec2 q = uv * (1.0 + fi * DEPTH);按照层进行缩放,实现近大远小的效果(想大于扩大了比例尺)q += vec2(q.y * (WIDTH * mod(fi * 7.238917, 1.0) - WIDTH * 0.5), SPEED * iTime / (1.0 + fi * DEPTH * 0.03));- 前半部分是添加了随机水平偏移量,将水平偏移范围平移到
[-WIDTH * 0.5, WIDTH * 0.5],使雪花的随机偏移左右对称。 - 后半部分随着时间
iTime的变化,雪花的垂直坐标不断增加,模拟雪花向下飘落的动态效果。并且深层的移动较慢vec3 n = vec3(floor(q), 31.189 + fi); vec3 m = floor(n) * 0.00001 + fract(n); vec3 mp = (31415.9 + m) / fract(p * m); vec3 r = fract(mp);
- 前半部分是添加了随机水平偏移量,将水平偏移范围平移到
- 这段代码用于生成随机数
vec2 s = abs(mod(q, 1.0) - 0.5 + 0.9 * r.xy - 0.45); s += 0.01 * abs(2.0 * fract(10.0 * q.yx) - 1.0); - 将坐标 q 映射到 [0,1) 区间内,从而产生一种周期性图案
- 最终
s,用来界定像素点在这些形状中的位置关系。- 即将一个坐标 q 转到一个小区域进行检验,这个区域中心有一个雪花图案,只有这个像素位于这个区域中的图案内,才进行显示
float d = 0.6 * max(s.x - s.y, s.x + s.y) + max(s.x, s.y) - 0.01;- 计算了像素与图案边界之间的距离
float edge = 0.005 + 0.05 * min(0.5 * abs(fi - 5.0 - dof), 1.0);- 则生成了一个羽化(显示)区域
acc += vec3(smoothstep(edge, -edge, d) * (r.x / (1.0 + 0.02 * fi * DEPTH)));- 只有区域内的像素才会有显示,并且遵循近处亮远处暗的原则
